Showing posts with label diy. Show all posts

Tuesday, October 29, 2013

Next Project: DIY Cloche

This has been in the back of my brain for a while, because I'm madly in love with cloches but I don't see a lot of them that are really getting the right shape as DIY.  So, my next challenge: figuring out a formula for flat patterning a really good cloche shape, that won't require more than intermediate math and sewing skills.  Of course, the real challenge in this will be remembering to take pictures of the process so I can post a tutorial!

This right here, this is the best shape:
But of course, this is in wool felt, and fabric just won't do exactly this.

This is a decent fabric version:
Except, yanno, with proper finishing.  

Wish me luck!

Saturday, October 19, 2013

My Latest Project

Another thing I've been wanting to do-- show some of my own work.  And today, in the spirit of weekend projects, I'd like to share the last thing I finished.

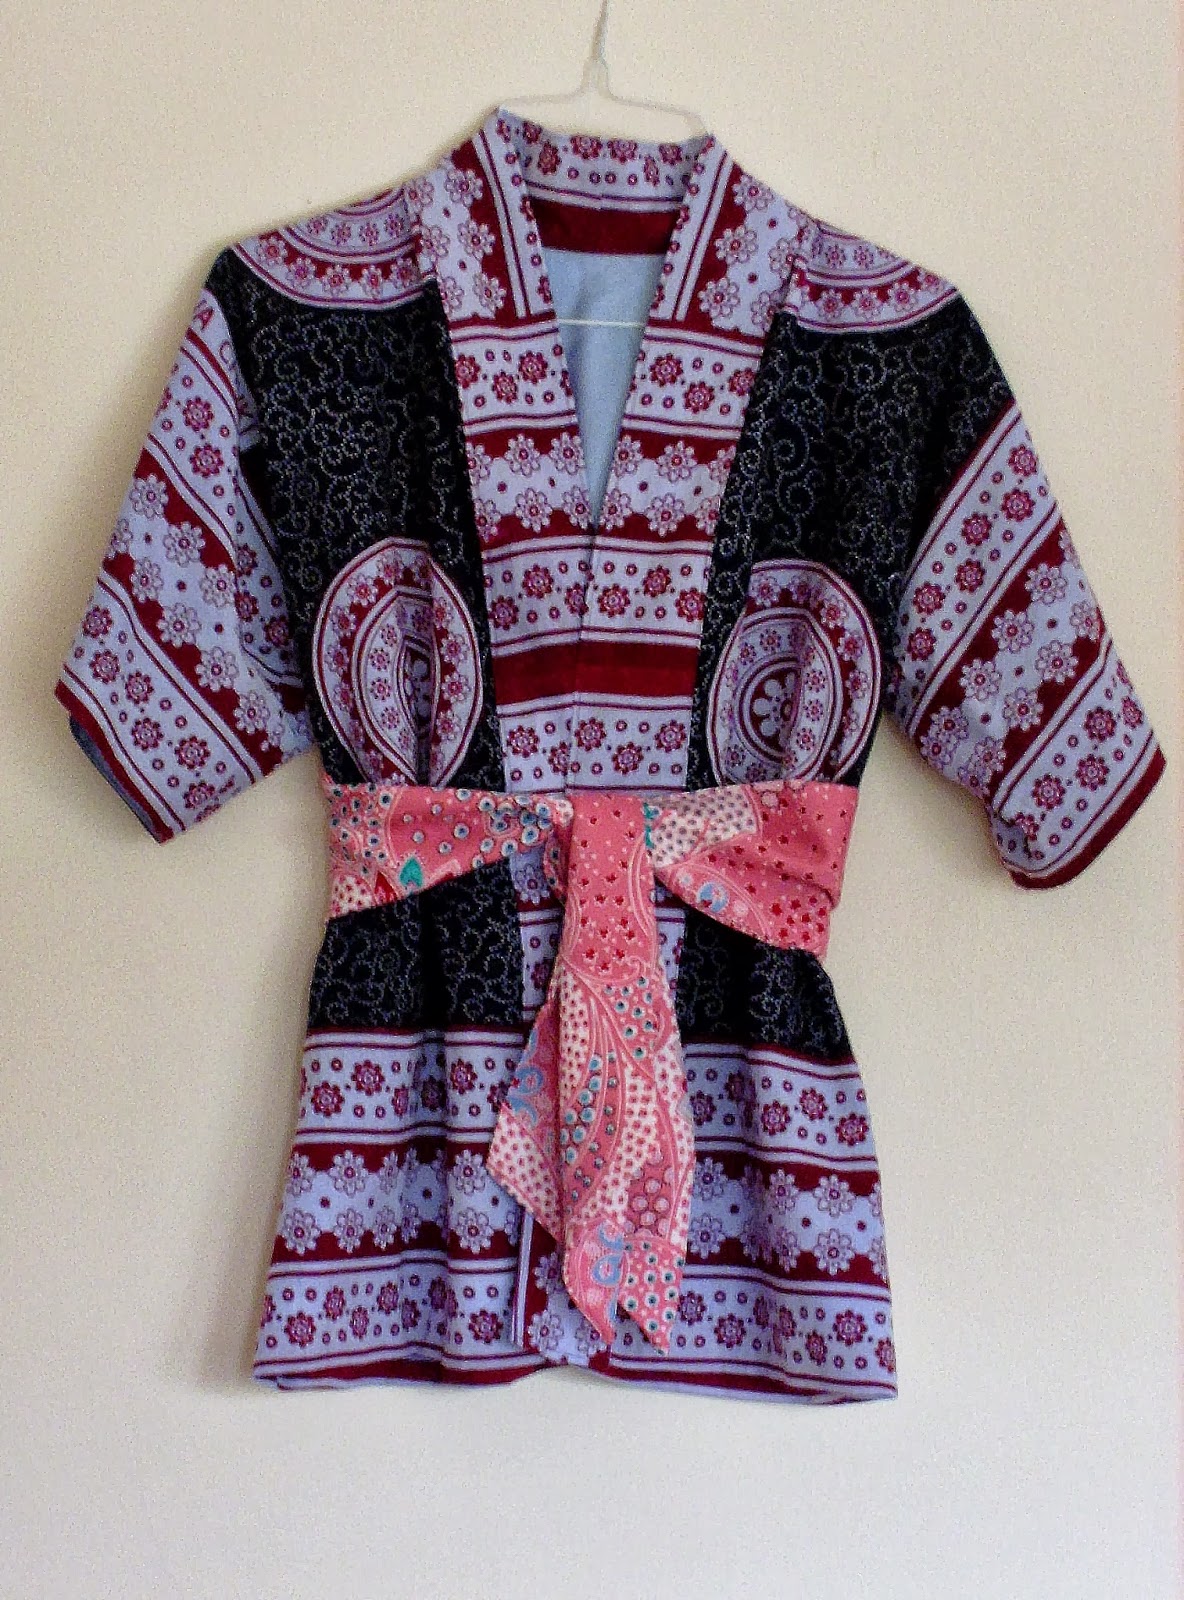
The fabric was so totally inspiring.  I found it as a very rough scarf on my last thrift store outing.  It was a large enough piece that I know I could make some sort of garment out of it.  It's a Tanzanian cotton, but the motif reminded me so much of traditional Japanese fabrics that I decided this would be my first pass for the season at a kimono style garment.

Now: kimonos need a lot of yardage, and I really didn't have it in this piece.  So I went way, way, way back in the history of clothing and decided to do a very primitive T shaped jacket.  To accomplish this, I folded my fabric in half the long way, and then cut a slit up the fold that ran half the length of the fabric, creating a front opening.  After this, I cut away the corners of fabric to create the T shape.

The corners were then pieced together to form a kimono style collar, which I interfaced to encourage it to lay crisply.  The stitching of the body of the jacket was remarkably simple.  If you do this yourself, you will have to make sure to clip your corners where the body turns to move into the sleeve.  The sleeve will never lay right without this.  I attached my lining through the hem first.  This picture will help you understand why, I think.

I was lucky enough to spend about a year training under a tailor, and I just love the way tailored hems look.  With this garment, hemming first was the easy method to accomplish what I wanted, and it provided the most efficient and durable construction.  I was able to machine stitch all of the finishing on this.

The next step was to baste the center fronts and neckline together with the wrong sides facing each other.  I applied the collar to the inside of the garment first, and the pinned the front side of the collar in face and stitched in the ditch to finish it off.  I also ended up doing a topstitch around the collar, because even with the interfacing, it was not behaving as I wanted.  The cotton was a looser weave and had a mind of its own.  I'm a firm believer in beating such fabrics into submission by whatever means necessary.  Back on track though-- after that, it was a simple matter of pinning up the sleeve hems and topstitching them, with the lining set back a bit from the cotton.  If I were to do this project again, I would probably break down and handstitch the sleeve hems.  The machine stitching gave the hems just a titch more body than I really wanted.

Next time I will try to be patient enough to take pictures of my process!  I do plan to do a few more T shaped garments, and hope to post a tutorial about how to cut one in the next couple months.


Saturday, October 12, 2013

Weekend Project: DIY Braided Belt

Check out this fabulously simple project from Delia Creates.


I'm in love with these, and I've been meaning to make one for myself for weeks now.  I wish this weekend would be the weekend it happens, but I have a terrible feeling I won't be able to squeeze out even the half hour I'd need.  I love that these would have a little stretch to them, so they'd give and move with you much better than a leather belt.

I would suggest a couple of small changes though.  First, when you are preparing your knit strips, I would attach them to the D rings before starting to braid.  You'll get a smoother attachment that way, without such a thick lump.  Then you can just park the D rings with fabric attached under your weighted object and braid away.  The second thing I would adjust would be to add a small piece of the same fabric to finish the end, by just wrapping it around the stitched bits where the braiding is all secured.  It'll make a more professional finish, I think.

Can't wait to try this out for myself!  Wish me luck that I can get to it this weekend.

Friday, August 23, 2013

Weekend Project

I don't happen to have an old yoga mat that needs a new life right now, but when I do, I will be borrowing some of Kelleen's fabulous ideas on what to do.  Check it out:
I'm especially in love with the yoga mat sandals.  That's gotta be on my to do list, and maybe it will even motivate me to give my yoga mat some extra love and attention until it wears out!

If you'd like to see some of Kelleen's upcycled creations, check out her Etsy shop, Pay Per Planet.

Monday, August 19, 2013

Edible, Home Made Hair Gel

Now I have to admit before I get into the how of this, I started doing it purely because I'm so in love with my dog.  He's got a little bit of the devil in him though, which even his trainer in puppy class acknowledged.  And of course, he looks like a dog version of a teddy bear-- no hint of the will and iffy attitude that lurks under the dewy eyes and shaggy coat.  So for graduation from puppy class, I gave him a blue mo-hawk.  It was that or a pair of red devil's horns, and the mo-hawk seemed like a better choice for many reasons.

Now I'm sure it makes sense why it had to be edible and entirely non-toxic.

So if you're nutty enough to style your dog, this is an easy win for you.  It would also work well on children of all ages, since you don't have to be worried about toxicity, even if they lick it.

Here's how to do it:

  1. Warm one cup of water in the microwave or kettle.
  2. If you want to have a colored gel, add your coloring to the water at this stage and mix thorougly.  I used food coloring, but natural, food based colors should work well also.  Just be careful of anything red on light hair!  Red has a tendency to glom on and last longer than you might want.
  3. Add 1/2 teaspoon of gelatin and mix thoroughly.  If you do not have the desired consistency, add another 1/4 teaspoon of gelatin at a time until you get there.  

Poof!  That's it.

Here's Max's picture from this experiment.
Wasn't he a cute little guy?

It should wash out easily, though I've never had a chance to test it.  Max's doggy friends chewed all of his out of his do.